Creamy Banoffee Pie Recipe that’ll Keep You Coming Back for More
Serve up a creamy, sweet, and sumptuous dish of mouthwatering proportions with our Banoffee pie recipe, and let you and your dinner guests gorge on one of Britain’s best-loved and most luxurious-looking desserts.
Banoffee Pie Recipe
Ready to find a place in your heart for a British dessert that simply ticks all the boxes when it comes to sheer indulgence? Let’s dive in, forks first, and find out all about this dish, and how you can make it at home.

What is Banoffee Pie?
A dish that’s name alone is delightful enough to lure you in, Banoffee pie is an English dessert that marries two wonderfully sweet ingredients, banana and toffee, in a sweet pie topped with thick, luscious cream.
Sometimes spelled ‘banoffi’, the ‘toffee’ part of banoffee pie is generally a thick caramel sauce, that is traditionally made from boiled condensed milk, or “dulce de leche”, one of Latin America’s most beloved sweet sauces.
All this indulgently sweet goodness is held together within a circular base of crumbed biscuit, with Biscotto or Digestives being popular choices, and butter. Coffee and chocolate are also common inclusions in banoffee pie recipes.
Recipe Ingredients
For our recipe, we have done our best to stay true to the traditional Banoffee pie recipe, which contains the following:

- Digestive Biscuits (or Graham Crackers) – 1 pack of 225g (8oz)
- Butter– 150g (5.3oz or 10tbsp), melted
- Dulce de Leche or Caramel – a can of 400 grams (14.1 oz)
- Bananas– 3 small fresh bananas, sliced
- Double Cream or Heavy Cream – 300ml (1 and 1/4 cup)
- Icing Sugar or Powdered Dugar – 1 tbsp
- Dark Chocolate – 4 squares of dark chocolate (optional, for flaking as a garnish)
Step-by-Step Instructions
Step 1 – Your first task is to make your rich, buttery base. Put your biscuits into a bowl or a food processor or blender, as we have done below, ready to be crushed.

Step 2 – If you don’t have a blender or food processor, crush your biscuits into a fine, crumbed mixture by putting them in a ziplock bag and crushing them with a rolling pin or similar kitchen tool. If you do have a food processor or blender, however, this step will be so much easier and more efficient.
Give the biscuits a few quick blends, to the point where your biscuits are crumbed, as shown below.

Step 3 – Melt your butter in a pan over the stove or in a microwave-proof bowl in the microwave, and add the melted butter to your biscuit mixture.
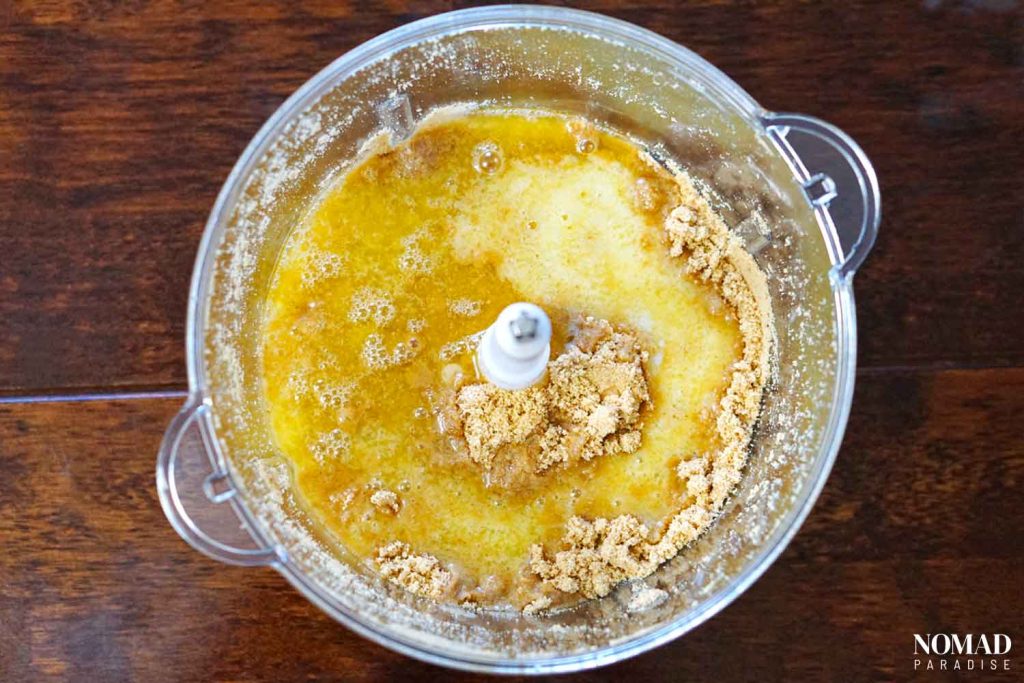
Step 4 – Blend the melted butter and biscuit crumb together.

Step 5 – Place the mixture into a loose-bottomed tart tin and cover the whole tin, including the sides, with the buttery biscuit mixture in an even layer. Push down with the back of a spoon to smooth the surface, and bake it in the oven at 180°(350°F) for about 10 minutes. Pull it out, wait for it to cool down. Optionally, after it’s cooled down, you can place the base in the refrigerator.

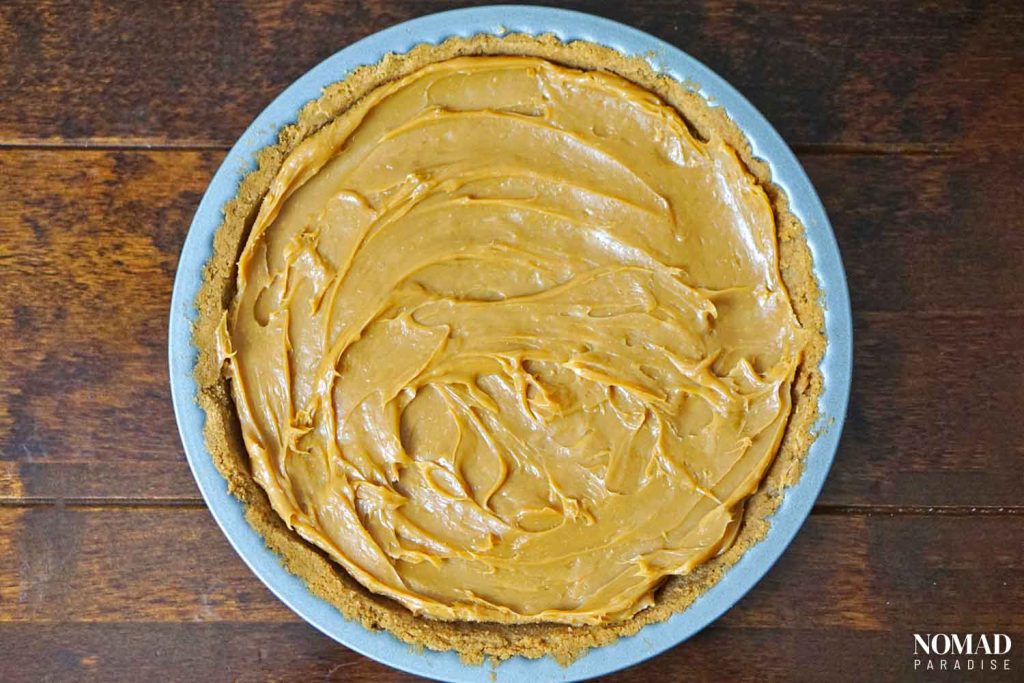
Step 6 – Once your base is ready, beat your caramel or dulce de leche to loosen it. Then spread the sauce over the bottom and sides of the biscuit base, spreading as evenly as you can using a palette knife or the back of a spoon.
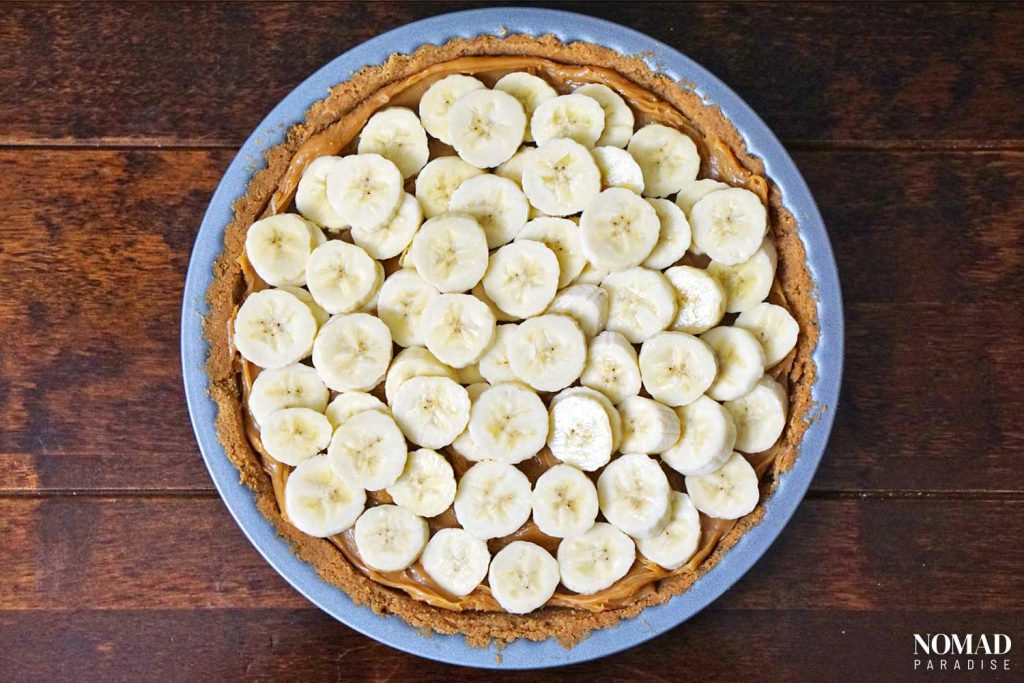
Step 7 – Peel and slice your three bananas into even slices, and place all the banana slices over the top of the caramel until the pie is covered, as shown below.
Step 8 – Whip the cream together with the icing sugar until you get medium peaks. Remove the pie from the refrigerator, and spoon the whipped cream over the whole of the banana layer until everything is covered.

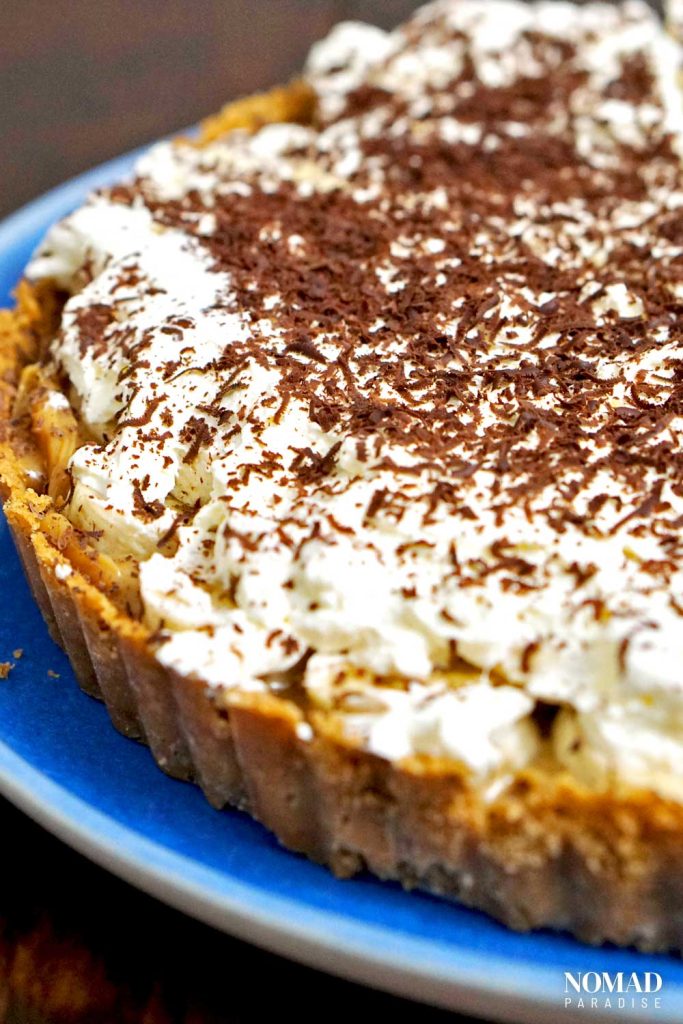
Step 9 – For a finishing touch, grate your dark chocolate over the top. Refrigerate the pie for at least one hour before serving.
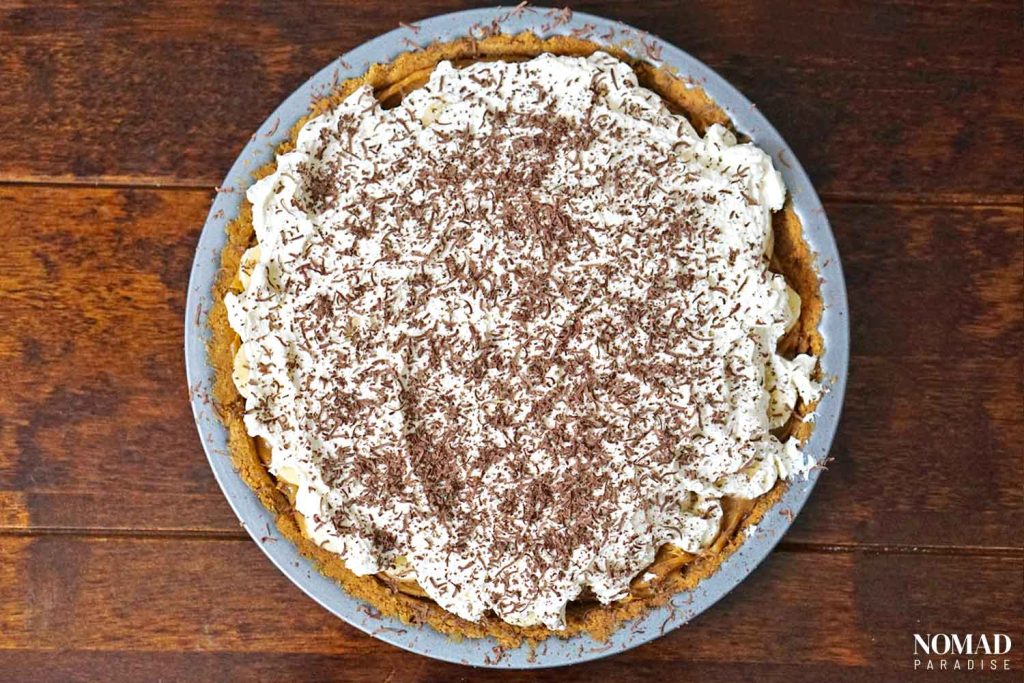
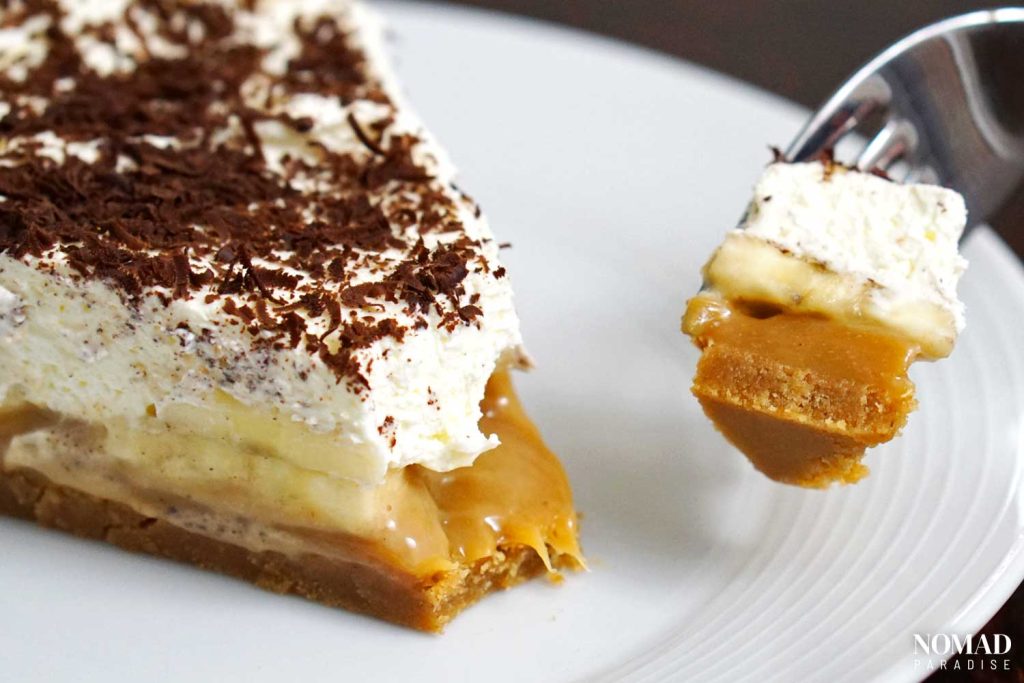
As sweet pies go, Banoffee pie truly is a sight for sore eyes with its chocolate-shaving speckled snow-white whipped cream top, encased in a crumbly, golden biscuit base.
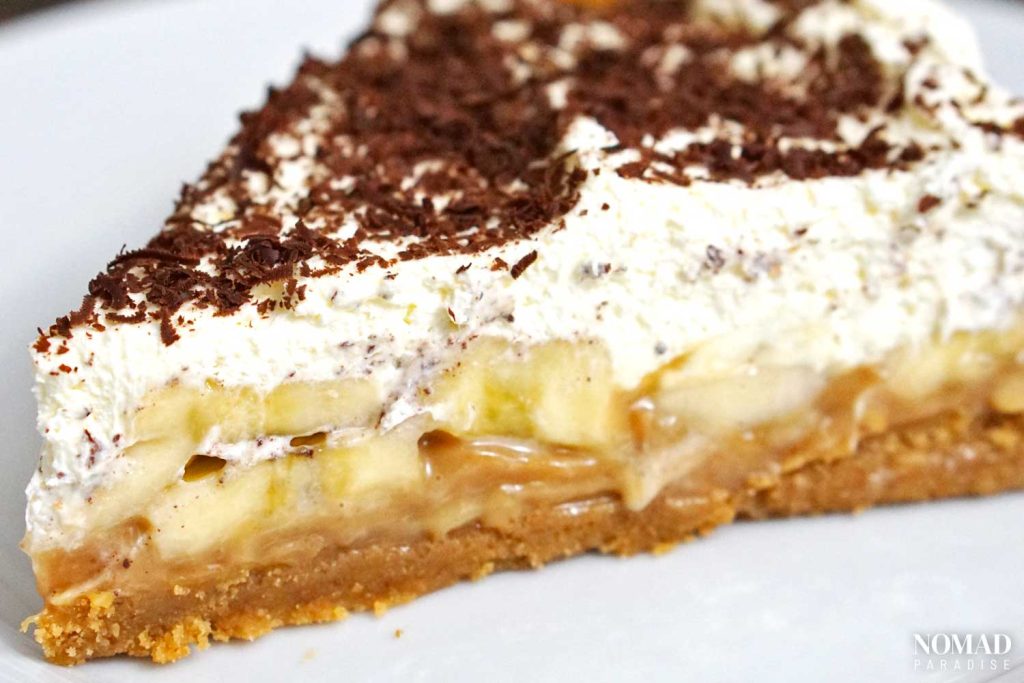
Yet without a doubt, the true magic happens when you cut that first slice, and lay eyes on the sweet, gooey, creamy, and buttery layers, blending together in a cross-section of both visual and flavorful perfection.
Your dinner guests are going to be wide-eyed and salivating from the moment they see you bringing this British classic to the table!
Banoffee Pie FAQs
Can Banoffee Pie be Vegan?
It absolutely can, and it really isn’t too much trouble to do so. All you need to do is substitute in the following ingredients, and follow the same steps for the recipe.
For the base:
- Vegan biscuits
- Vegan butter alternative
For the filling:
- Vegan butter alternative
- Light brown soft sugar
- Vegan condensed milk alternative or caramel alternative
- Plant-based vegan whipping cream
- Cornflour
Serve with:
- Plant-based vegan whipping cream
- Vanilla extract or vanilla bean paste
- Vegan chocolate shavings
Is Banoffee Pie Gluten-Free?
Traditionally Banoffee pie has been made with a wheat-based biscuit base, so the classic recipes are very unlikely to be gluten-free.
However, you can very much substitute in ‘free from’ alternatives for the wheat-based ingredients. Seeing as only the biscuit base contains gluten, with the right ingredients it is relatively straightforward to make Banoffee pie a gluten-free dessert.
Should You Serve Banoffee Pie with Anything?
Already bringing to the foray the textures of rich caramel, soft banana, and whipped cream over a buttery biscuit base, you can absolutely enjoy a slice of Banoffee Pie as it is, chilled straight from the refrigerator.
However, if you’d like some serving suggestions, try the following:
- A scoop of ice-cold vanilla or salted caramel ice cream
- Cup of hot coffee
Banoffee Pie Origin
Origin stories are nearly always heavily debated topics when it comes to native cuisines and desserts, and Banoffee pie is no different.
While the exact origin continues to be disputed within various culinary circles, chefs Nigel Mackenzie and Ian Dowding, who were the owners of the now-closed restaurant The Hungry Monk in East Sussex, England, claim to be the inventors of the Banoffee pie we know and love today.
The pair claim they first developed the dessert in 1971 after several attempts to amend an American recipe for ‘Blum’s Coffee Toffee Pie’ that just wasn’t coming out right.
The two chefs made several changes to the recipe, including trying it with apple and mandarin slices, before eventually trying banana. Dowding stated they ‘knew straight away they had got it right’ once they tried the banana variation of the recipe.
Combining the words ‘banana’ and ‘toffee’, it is believed Mackenzie was the first to suggest the name ‘banoffi pie’, and very quickly the dish was proving so popular with customers, that they had to keep it on the menu.
There are other people, however, who believe the two chefs ‘borrowed’ the recipe from a local tea lady, whom they believe is the true creator of this classic British dessert.
While it seems none of us will ever know the true origin of the dish, what those in culinary circles can agree on is the traditional recipe, which should always contain:
- A crumbly base of crushed biscuit or pastry, which is mixed with melted butter
- A layer of caramel or toffee made from scratch
- Fresh banana slices
- A covering of fresh whipped cream
Banoffee Pie Variations
While Banoffee pie is a showstopper of a dessert that simply works, if you’re feeling a little adventurous there are a few variations you can try making yourself, including:
Strawboffee Pie
Recipe-wise, Strawboffee pie follows the same steps as Banoffee pie, but instead switches in sliced strawberries for sliced bananas. As strawberries are very much a seasonal fruit in the UK, this is a great choice to make in late spring or throughout summer.
Coconut Banoffee Pie
For a beautiful Caribbean twist, you can add Bourbon to the biscuit base, Malibu liqueur to make the top layer a coconut-infused creamy filling, and finish the pie with coconut shavings.
Fruitoffee Pie
In the same way that Strawboffee pie came to be, you can substitute various sliced fruits for the banana slices, while following the same recipe, to create a unique Fruitoffee pie.
Chocolate Banoffee Pie
For a fudgy, rich, and chocolatey take on Banoffee pie, you can create a dark chocolate biscuit base in which your caramel or toffee, banana, and whipped cream layers can rest. Top with shaved chocolate for a dessert that chocolate lovers will go ga-ga for!
Coffee Banoffee Pie
Wonderfully fun to say, for a deeper, more mature flavor, you can make your Banoffee Pie a coffee dessert by adding either/both coffee to the biscuit base, and/or topping the cream with a coffee-based liquor, such as Kahlua or Tia Maria.
How Long Will Banoffee Pie Keep?
Because of the use of fresh cream and chopped fruit in Banoffee pie, the dessert can last around 2-3 days in the refrigerator, if properly covered with clingfilm, or stored in an airtight container.
Can You Freeze Banoffee Pie?
You can definitely freeze the Banoffee pie biscuit base once made. However, freezing the whole dessert is not recommended. Whipped cream freezes very poorly, the filling will lose its creamy texture, and the sliced bananas, once defrosted, will become very soggy.
Banoffee Pie Recipe Card

Ingredients
- Digestive Biscuits or Graham Crackers – 1 pack of 225g (8oz)
- Butter- 150g 5.3oz or 10tbsp, melted
- Dulce de Leche or Caramel – a can of 400 grams 14.1 oz
- Bananas- 3 small fresh bananas sliced
- Double Cream or Heavy Cream – 300ml 1 and 1/4 cup
- Icing Sugar or Powdered Dugar – 1 tbsp
- Dark Chocolate – 4 squares of dark chocolate optional, for flaking as a garnish
Instructions
- Your first task is to make your rich, buttery base. Put your biscuits into a bowl or a food processor or blender. Give the biscuits a few quick blends, to the point where your biscuits are crumbed. If you don’t have a blender or food processor, crush your biscuits into a fine, crumbed mixture by putting them in a ziplock bag and crushing them with a rolling pin or similar kitchen tool.
- Melt the butter in a pan over the stove or in a microwave-proof bowl in the microwave, and add the melted butter to the biscuit mixture. Blend the melted butter and biscuit crumb together.
- Place the mixture into a loose-bottomed tart/pie tin and cover the whole tin, including the sides, with the buttery biscuit mixture in an even layer. Push down with the back of a spoon to smooth the surface.
- Preheat the oven to 180°(350°F) and bake the crust in the oven for about 10 minutes. Pull it out and wait for it to cool down. Optionally, after it’s cooled down, you can place the base in the refrigerator.
- Once the base is ready, beat the caramel or dulce de leche to loosen it. Then spread the sauce over the bottom and sides of the biscuit base, spreading as evenly as you can using a palette knife or the back of a spoon.
- Peel and slice your three bananas into even slices, and place all the banana slices over the top of the caramel/dulce de leche until the pie is covered.
- Whip the cream together with the icing sugar until you get medium peaks. Spoon the whipped cream over the whole of the banana layer until everything is covered.
- For a finishing touch, grate your dark chocolate over the top. Refrigerate the pie for at least one hour before serving.
You Might Also Like to Read:
Save and Pin for Later
Keep our recipe for this classic British dessert in a safe place by saving it to one of your dessert recipe boards.

Author: Doina is a content strategist, writer, and passionate home cook, who has traveled extensively to over 35 countries and counting, and loves to use foods tried on her travels to inspire her own dishes at home.
Contributor: Clarice Taylor is a former pastry chef turned content writer, based in the UK, who writes in a number of niches, including food and travel.